 QuoteCloud
Choose how a discount appears
Show a line discount as a crossed-out price, in a discount column or as a lower price, and see how it affects the totals.
Each discounted row has its own display setting. Choose it under On the line when you add the discount, or under On the line in the row's menu later.
The three choices
Strikethrough shows the original price crossed out, with the new price below it. It's the clearest way to show a saving.
Discount column keeps the original price and shows the discount in its own column.
Reduced price shows only the lower price, and the row doesn't mention a discount.
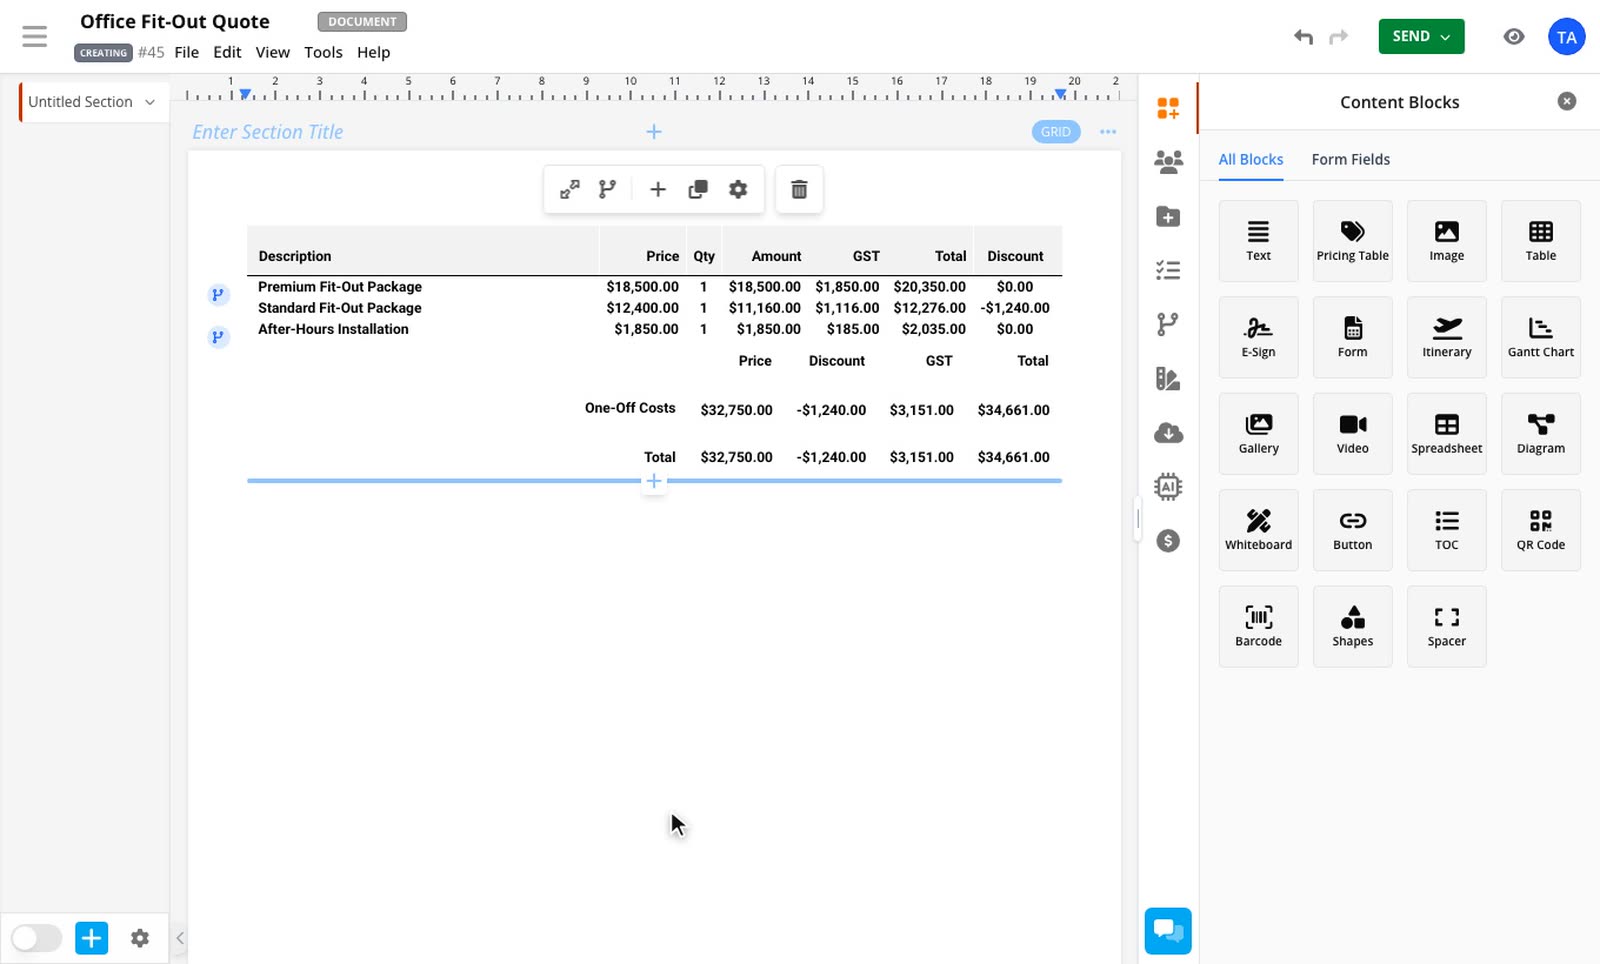
The document, the customer's view and the PDF all show your choice. While you're editing the table, its boxes keep the original price so you can change it.
The discount column applies to the whole table
A column can't show for just one row. If one row uses Discount column, the column shows for every row, and rows with no discount show $0.
To keep the column out of the table, use Strikethrough or Reduced price instead.
How the totals work
A line discount follows the table's totals Discount. Nothing you do in the row's menu adds, shows or hides it, so you stay in control of your totals layout.
When the Discount total is showing, the discount appears there, and the subtotal is the amount before the discount.
When the Discount total is hidden or not in the table, the discount comes off the subtotal, so the figures still add up.
If you change the Discount total later, the figures follow.
There are two exceptions:
A discount hidden from your customer always comes off the subtotal and never appears in the Discount total.
An after-tax discount comes off the overall total, whether or not the Discount total is showing.
To change what the totals show, see Showing or hiding price table totals.
Related guides
- Discount a line itemTake a percentage or a fixed amount off a single row, per unit or for the whole line.Line Item Adjustments add-on
- Hide a discount from your customerGive a lower price without showing that a discount exists, in the document, the PDF or anything sent to other apps.Line Item Adjustments add-on
- Showing or Hiding Price Table TotalsLearn how to show or hide the totals section in QuoteCloud price tables. Step-by-step instructions to control price summary visibility in your documents.