 QuoteCloud
Change a discount, markup or margin with a pricing rule
Turn a discount or margin on or off, set its amount and choose whether to show it, based on what your recipient selects or answers.
A pricing rule can change a row's discount, markup or margin while your recipient reads the document. Pick the premium package and the installation row drops by 10%. Change the selection and the discount goes away again.
You need both the Conditional Pricing and Line Item Adjustments add-ons. A rule that sets or changes a discount also needs Discount Access in your role.
If you're new to rules, start with Make pricing react to a recipient's choices.
Add a rule that adjusts a price
5 steps
Start a new rule
In the editor, open Logic and select New rule. You can also right-click a row and select Conditional logic.
Choose the item
Choose the row, section or whole table to change.
Choose Adjust its price
Choose Adjust its price, then choose what to change and enter the amount. See the choices below.
Choose when it applies
Choose Only when… and set the condition, such as a row being selected or a form answer.
Create and try it
Select Create rule, then Preview as recipient to make the choices your recipient would make.
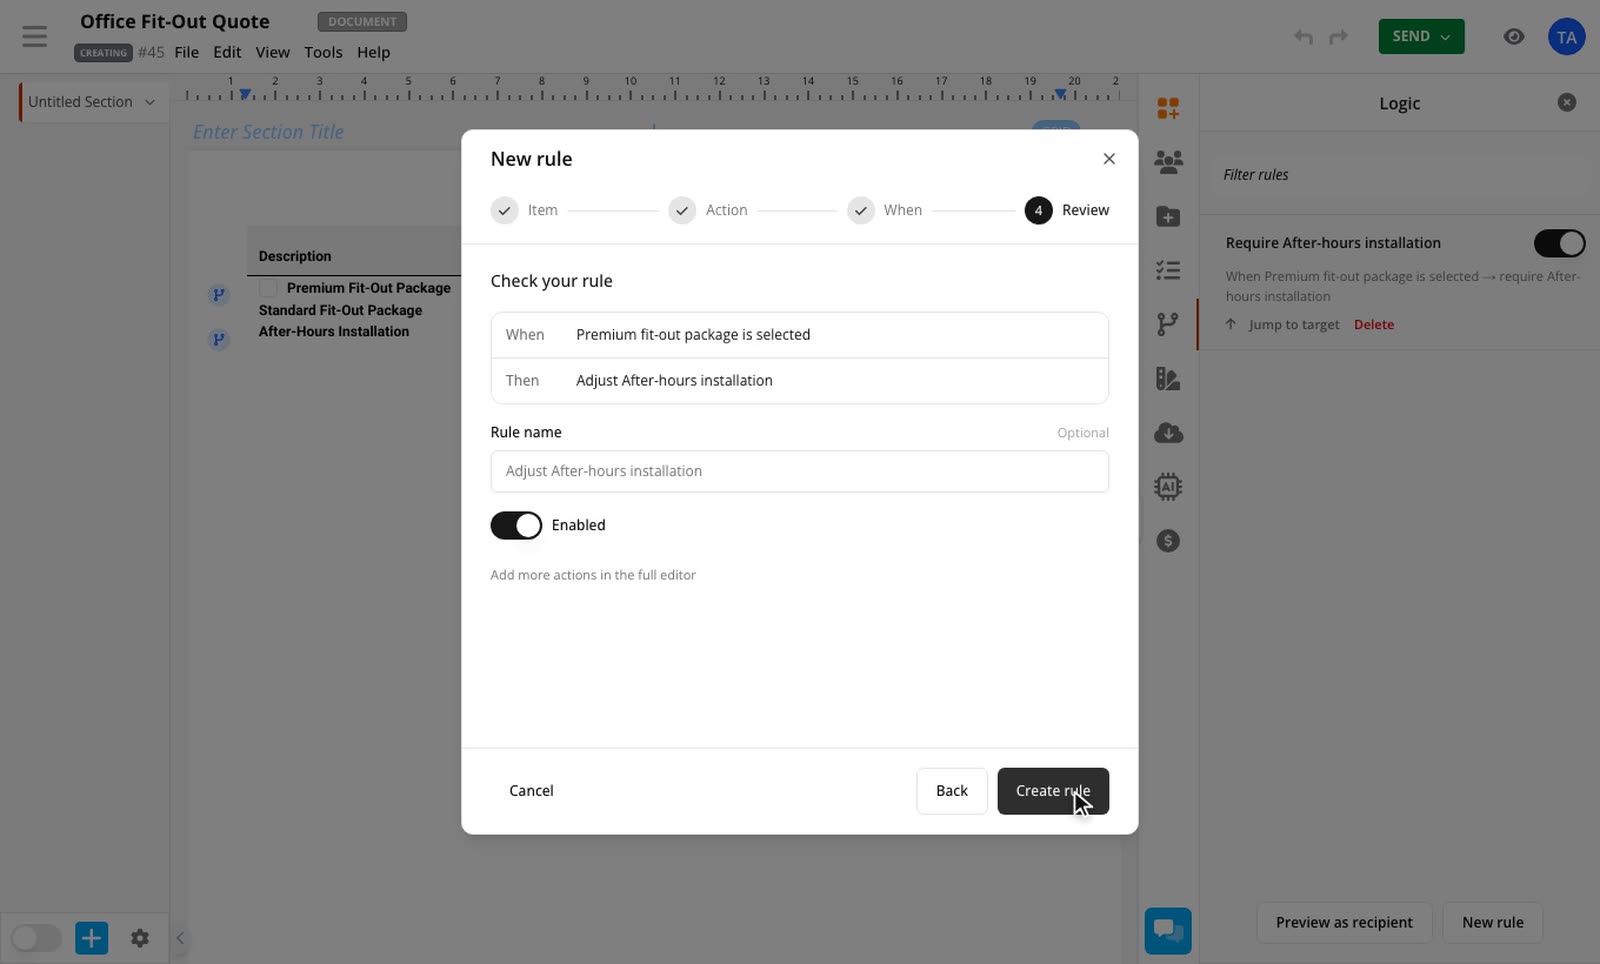
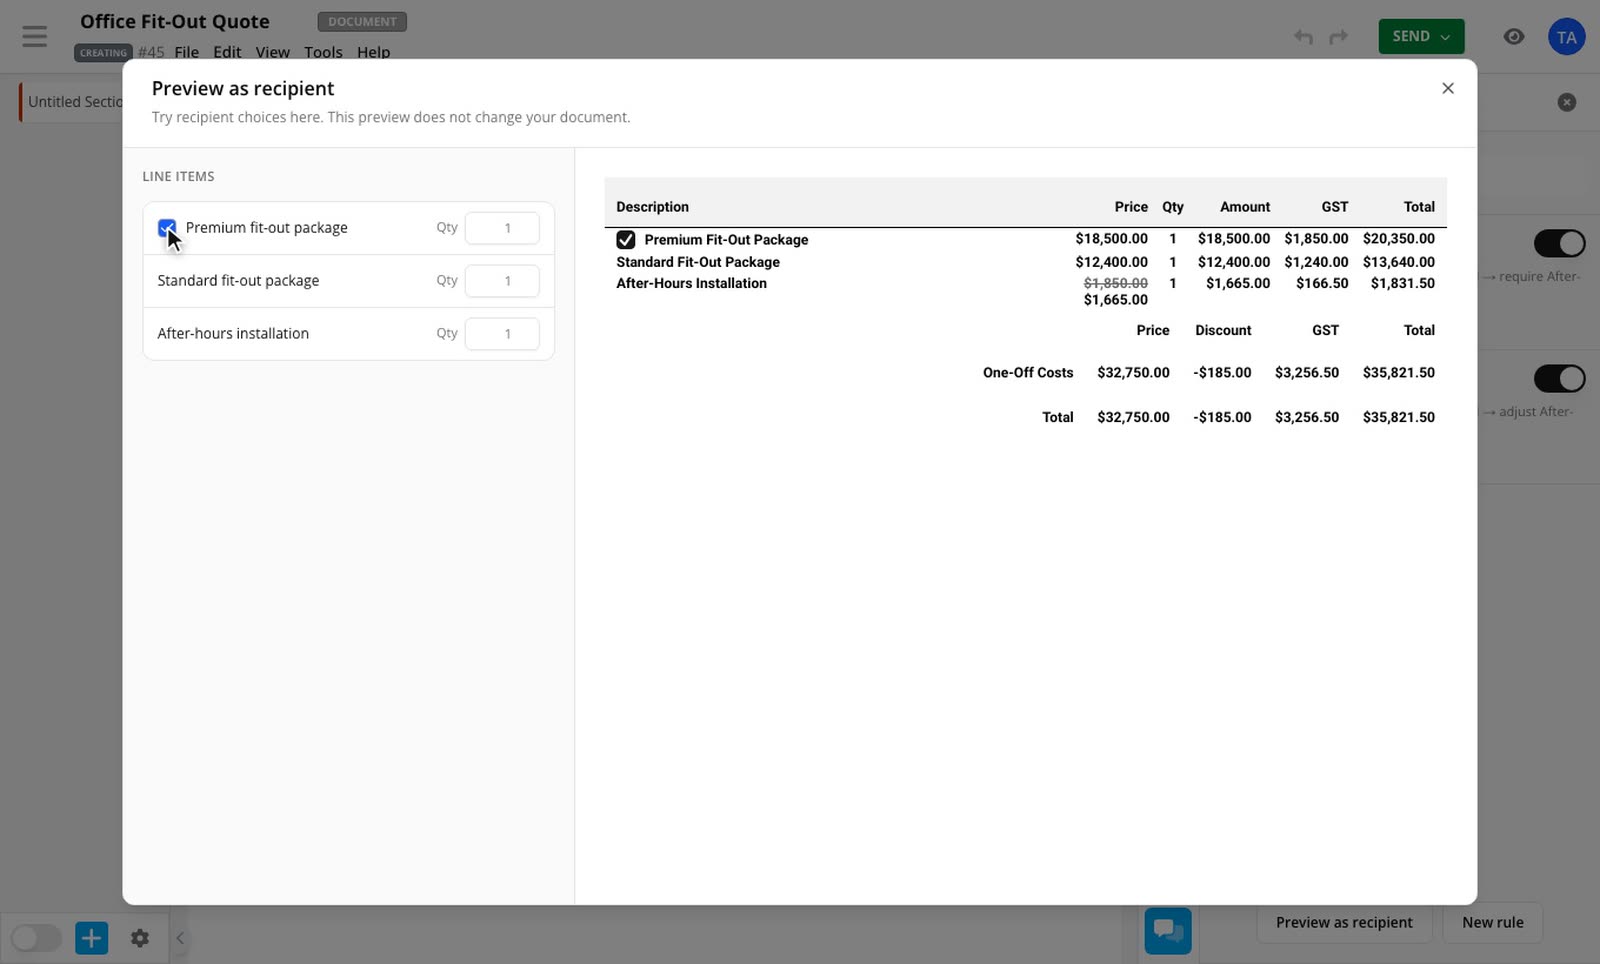
When you edit a saved rule, this action is called Set adjustment.
What a rule can change
Set a discount: the amount, as a Percentage or Fixed amount, and how it shows.
Change how the discount shows: keeps the row's amount and changes only how it appears. Rows with no discount stay as they are.
Turn the discount off: removes the row's discount while the rule applies.
Set a markup or Set a margin: enter the percentage. The price is worked out from the row's cost.
Turn the markup or margin off: the row goes back to the price it had before the markup or margin.
You type the amount into the rule. It can't come from a form answer.
When the rule stops applying, the row goes back to its own saved settings.
Choose whether your recipient sees it
For a discount, Show as gives you three choices:
Strikethrough crosses out the original price. This is the default.
Discount column shows the discount in the table's discount column.
Hide from customer gives them only the lower price, as if it were the real price.
Place the discount column
If you choose Discount column, a Placement option appears.
If the table already shows a discount column, it reads Current location and can't be changed.
If it doesn't, choose the column it should follow, such as After Quantity. Hover over a choice to see the result highlighted in the table.
Until you choose, the column goes after the amount column, or before the total if there's no amount column. If the column you chose is later removed or hidden, the default position applies.
The column is shared by the whole table. If several rules place it, the rule that wins on the first affected row decides where it goes.
What you see in the editor
The row and the totals show the rule's result as soon as the condition is met, for example when you tick the trigger row.
While you're editing the table, its boxes keep your saved figures, and a small Rule label shows what the rule sets. That way, editing never saves the rule's figures over your own.
When more than one rule matches
Each row takes one adjustment. If two rules match the same row, the first rule in the Logic panel wins.
If another rule hides or strikes out the row, that outcome still applies and the row leaves the totals.
Rows a rule skips
Some rows can't take the adjustment, such as a row with a manual total, or a markup on a row with no cost. The rule still works for every other row, and the Logic panel shows a label such as Skips 2 rows. Hover over it to see why. See why an adjustment didn't apply.
When your recipient accepts
Rules run again when your recipient accepts or signs, and the result is saved with the document. Editing the rules later doesn't change an accepted quote. PDFs show the rule's result too.
What your recipient can see
Your recipient never receives the row's cost or the rule's percentage. To keep the page quick, the price for each possible answer is worked out in advance and sent with the page. Someone who reads the page's source could find the price for an answer they haven't picked.
Limits
The prices for each answer are worked out when the page loads. If you change the rows after sending, your recipient sees the old figures until they reload. Accepting always uses the current rows.
A fixed discount can end up larger than the line if your recipient lowers the quantity. The page still shows it, but it's skipped when they accept. Use a percentage if your recipient can change the quantity.
You can see these rules on a phone, but you add and edit them in the desktop editor.
Related guides
- Pricing rule examples for discounts and marginReady-to-copy rules for bundle discounts, volume discounts, returning customer pricing and more.Line Item Adjustments and Conditional Pricing add-ons
- Make pricing react to a recipient's choicesUse pricing rules to hide, require or cross out items when a recipient selects a row, changes a quantity or answers a form.Conditional Pricing add-on
- Why an adjustment isn't available or didn't applyFixes for greyed-out options, skipped rows and discounts that don't appear the way you expected.Line Item Adjustments add-on